
Lambda development using Docker and Visual Studio Code
Recently, I discovered how easy it is to use Visual Studio Code with Docker, and I’ve started using it when developing AWS Lambda. Having a local environment that matches Lambda’s runtime in the cloud has eliminated mine “it works on my machine” errors—where code runs fine locally but frustratingly fails when deployed.
Debugging Lambda code on AWS sucks! It’s frustrating to go through the laborious cycle of adding print statements, uploading the changes, re-running the function, then switching to the logs in hopes of isolating where and why an error is occurring — all while muttering, “Why isn’t it working?”
This setup will avoid a number of issues, though to be fair, there are always gotchas. I outline how I go about setting up Visual Studio Code and Docker as my development environment, which sets you up nicely if you want to deploy your code as a Docker image or run your tests in a Docker container as part of a continuous integration workflow.
Code Setup
First up install VSCode, AWS CLi and Visual Studio code. The extension Dev Containers also needs to be installed which allows you to use a Docker container as your development environment. You’ll also need to have installed Docker and Docker Desktop. This provides the docker server, and a nice visual way to interact with Docker resources.
Dockerfile
The Docker image needs to match the Lambda runtime environment. The official Docker image is found here page, along with a code sample to get started. In the code below, I also copy over the src folder, containing my custom code, and the handler function which Lambda calls to initiate the process.
Dockerfile
# Image used by AWS for lambda python
FROM public.ecr.aws/lambda/python:3.13

# Add tar used by VSCode
RUN dnf install -y tar \
 && dnf clean all

# Copy requirements.txt
COPY requirements.txt ${LAMBDA_TASK_ROOT}

# Install the specified packages
RUN pip install -r requirements.txt

# or copy src and lambda function
COPY src/ ${LAMBDA_TASK_ROOT}/src/
COPY lambda_function.py ${LAMBDA_TASK_ROOT}

# Set the CMD to your handler (could also be done as a parameter override outside of the Dockerfile)
CMD [ "lambda_function.handler" ]
Since our project is written in Python, use the official AWS Python image as the base for your Docker image.
Visual Studio Dev Container setup
When Visual Studio Code creates a development container, it uses the Docker image specified in your project’s Dockerfile as the base, then layers on additional functionality to enable Visual Studio Code to run inside the container. This configuration is defined in the devcontainer.json file, which we’ll add shortly. TAR and ZIP packages are included because Visual Studio Code builds on top of this image and requires them during the build process.
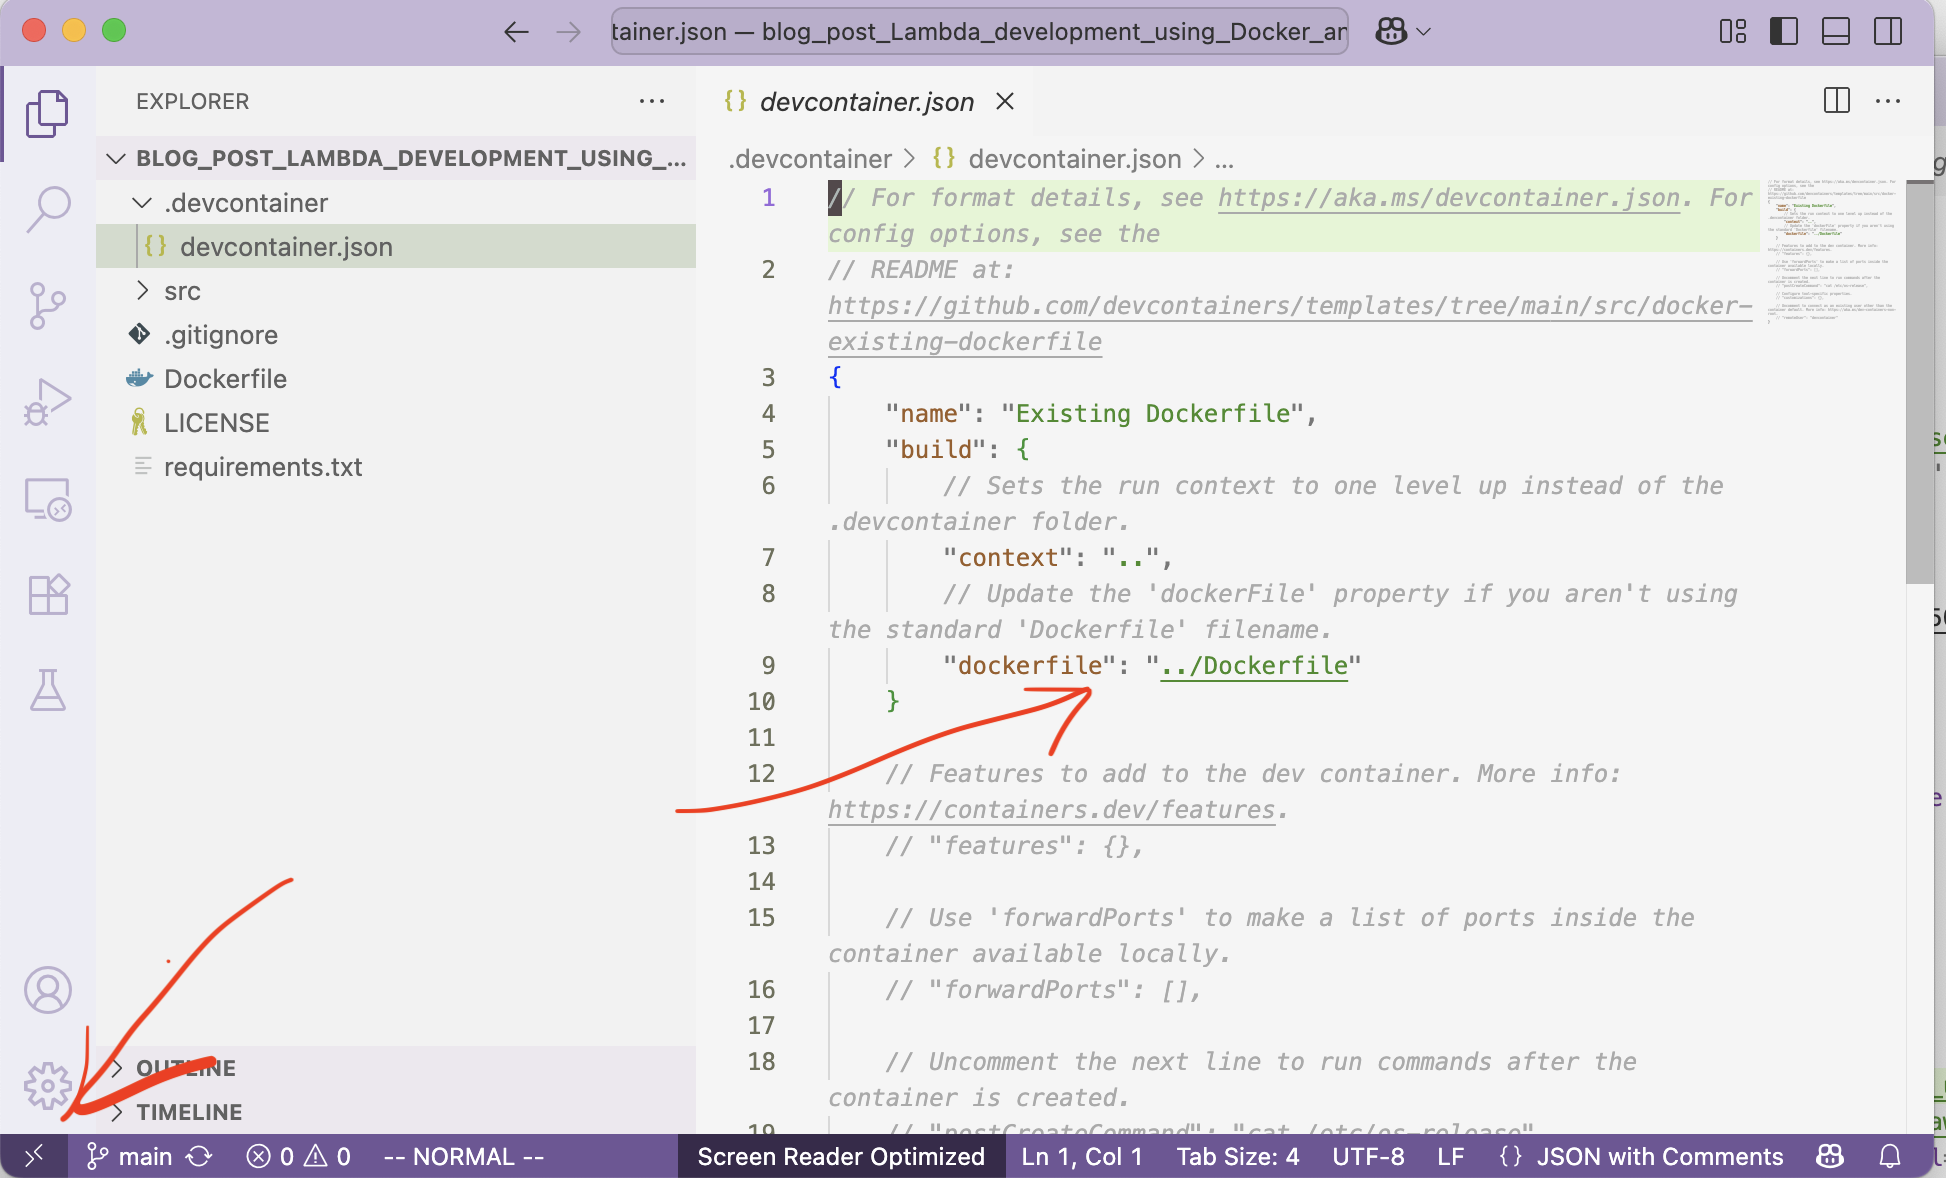
The final step is to add Visual Studio Code’s devcontainer.json file to your project. This file configures the development container to use your Docker image—specified in the Dockerfile—as its base.
This file is auto-generated by clicking the icon in the bottom-left corner of Visual Studio Code (see image below), then selecting Open Container Configuration File. Next, click through the options, make sure to select Add the configuration to your workspace and confirm that it is based on your project’s Dockerfile. Your file should appear as shown below, under the .devcontainer directory
Your Lambda function will likely need to be able to connect to your AWS resources ie S3, SES,and SNS so you will need a way of authenticating yourself.
To get started, you’ll need to create an IAM user with policy permissions for the resources that you need. Then, create access keys for this user so you can make programmatic calls using those keys for authentication.
To connect to AWS from your computer, run aws configure in your terminal application and enter the access keys you have previously downloaded when you created the IAM user. This will generate the ~/.aws/credentials file.
Your Visual Studio Code container does not have access to this file by default. To make it available inside the container, you’ll need to add a volume that links the credentials file into the container. This can be configured using devcontainer.json.
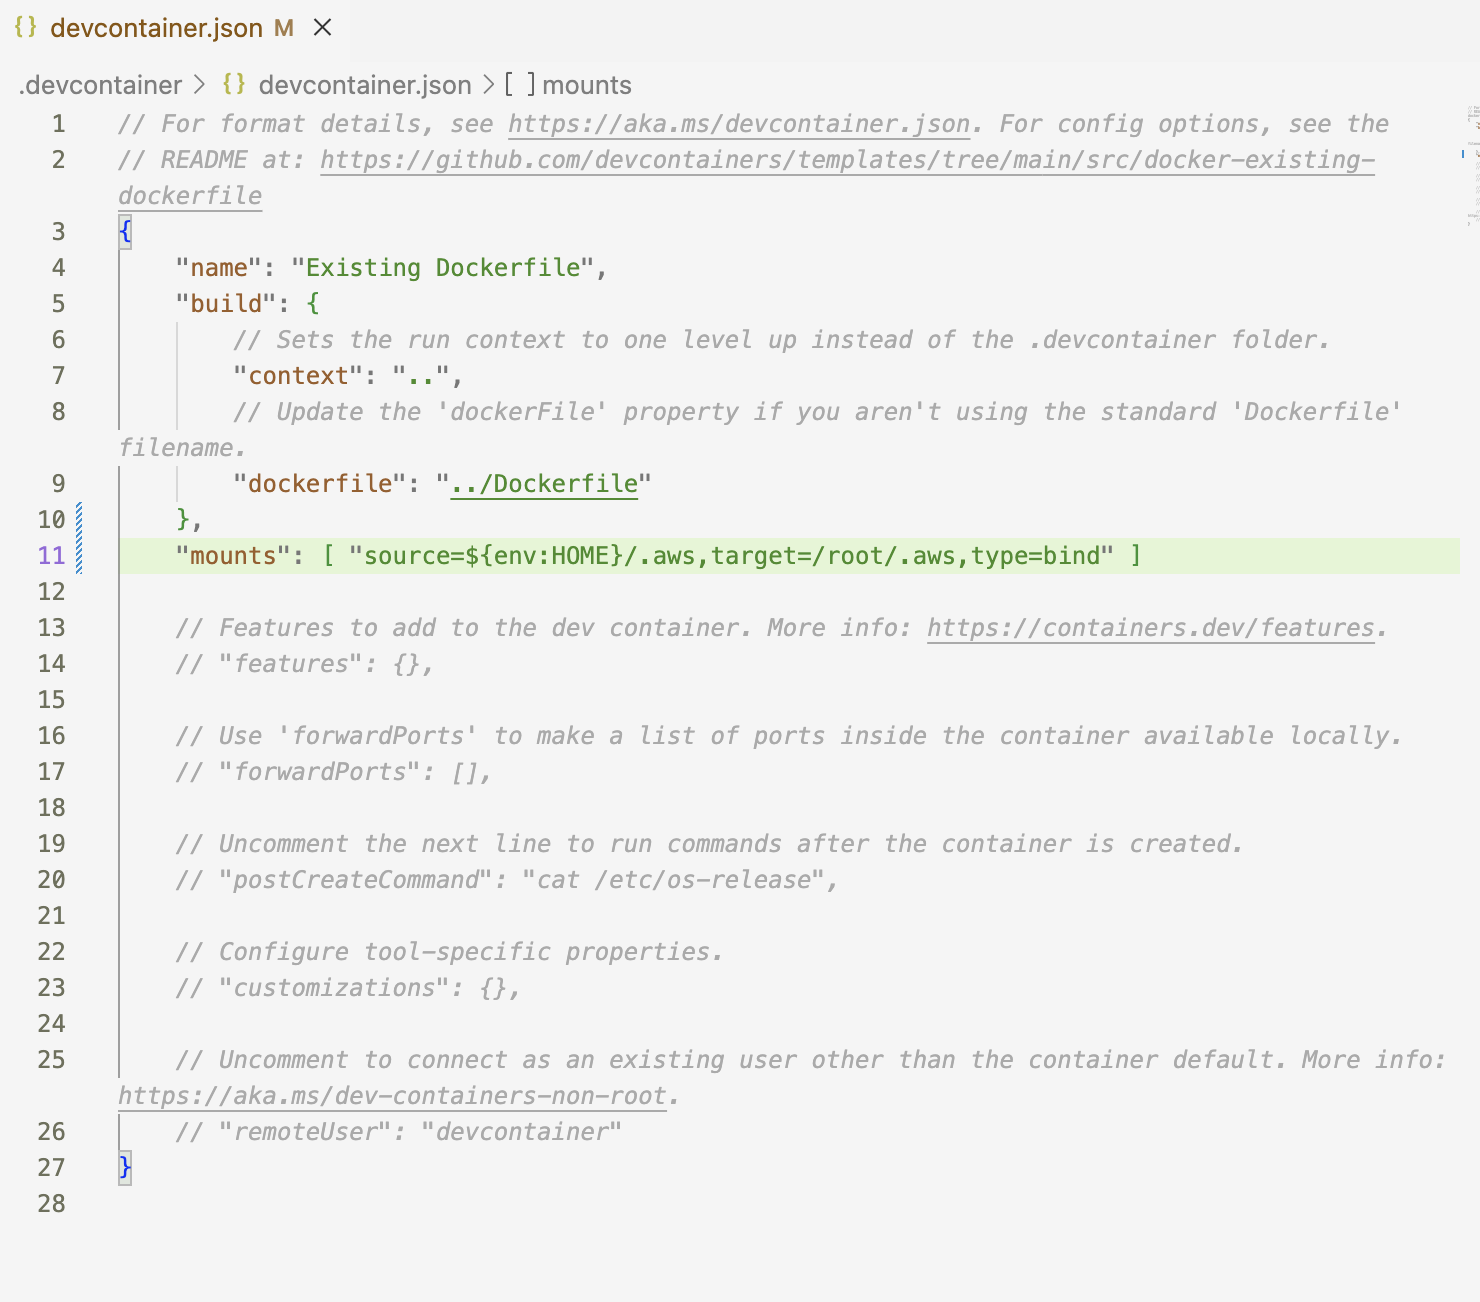
This mounts your local ~/.aws/credentials directory into the container’s ~/.aws/credentials directory. As a result, any AWS SDK calls made from within the container — such as using boto3.client in Python — will automatically use your local credentials. This approach avoids the need to hardcode access keys or manually set environment variables.
At this point, you should be able to open Visual Studio Code, which will automatically prompt you to attach to the container. Your Python code using boto3.client will authenticate automatically, allowing you to interact with your AWS resources—depending on the permissions assigned to that IAM user.
Using CDK (python)
While I take a very hands-on approach to developing Lambda functions, when it comes to deploying, I use the AWS CDK to provision resources. This approach allows me to define resources in code, specify what permissions are attached, and—if using Git—track who made what changes through an audit trail. I can quickly adjust permissions, which helps ensure I’m following best practices by giving each resource only the minimal permissions it needs to run.
CDK for Python is Not a Runtime Environment (Gotchas)!
CDK for Python is not a Python runtime environment. You can’t use it to check for the existence of a resource at runtime and then conditionally provision other resources based on that check. Instead, CDK synthesizes your Python code into a CloudFormation template, which AWS then uses to provision resources. While CDK does support if/else logic, any conditional behavior must rely on the state that you pass into the CDK app
I found myself in that position when my CDK provisioned both the Elastic Container Registry and the Lambda function with a Docker image. The image needed to be uploaded to the registry before the Lambda could be created. To handle this, I passed a flag to have the CDK provision only the registry, and then I re-ran it once I had uploaded the image.
Running CDK for the first time
cdk deploy --context image_exists=0
The CDK code where the flag is used
Architecture Compatibility for AWS Lambda with Apple Silicon Macs (Gotchas)!
The new MacBooks with Apple Silicon build Docker images uses ARM64 architecture, which is not compatible with the x86 architecture expected by AWS Lambda. This mismatch can cause issues, such as Lambda failing to locate your function’s entry point.
To resolve this, use Docker’s buildx feature, which allows you to specify a compatible CPU architecture --platform=linux/amd64 when building your image.
docker buildx build --platform=linux/amd64 -t <image-name> .
Deploying to Production
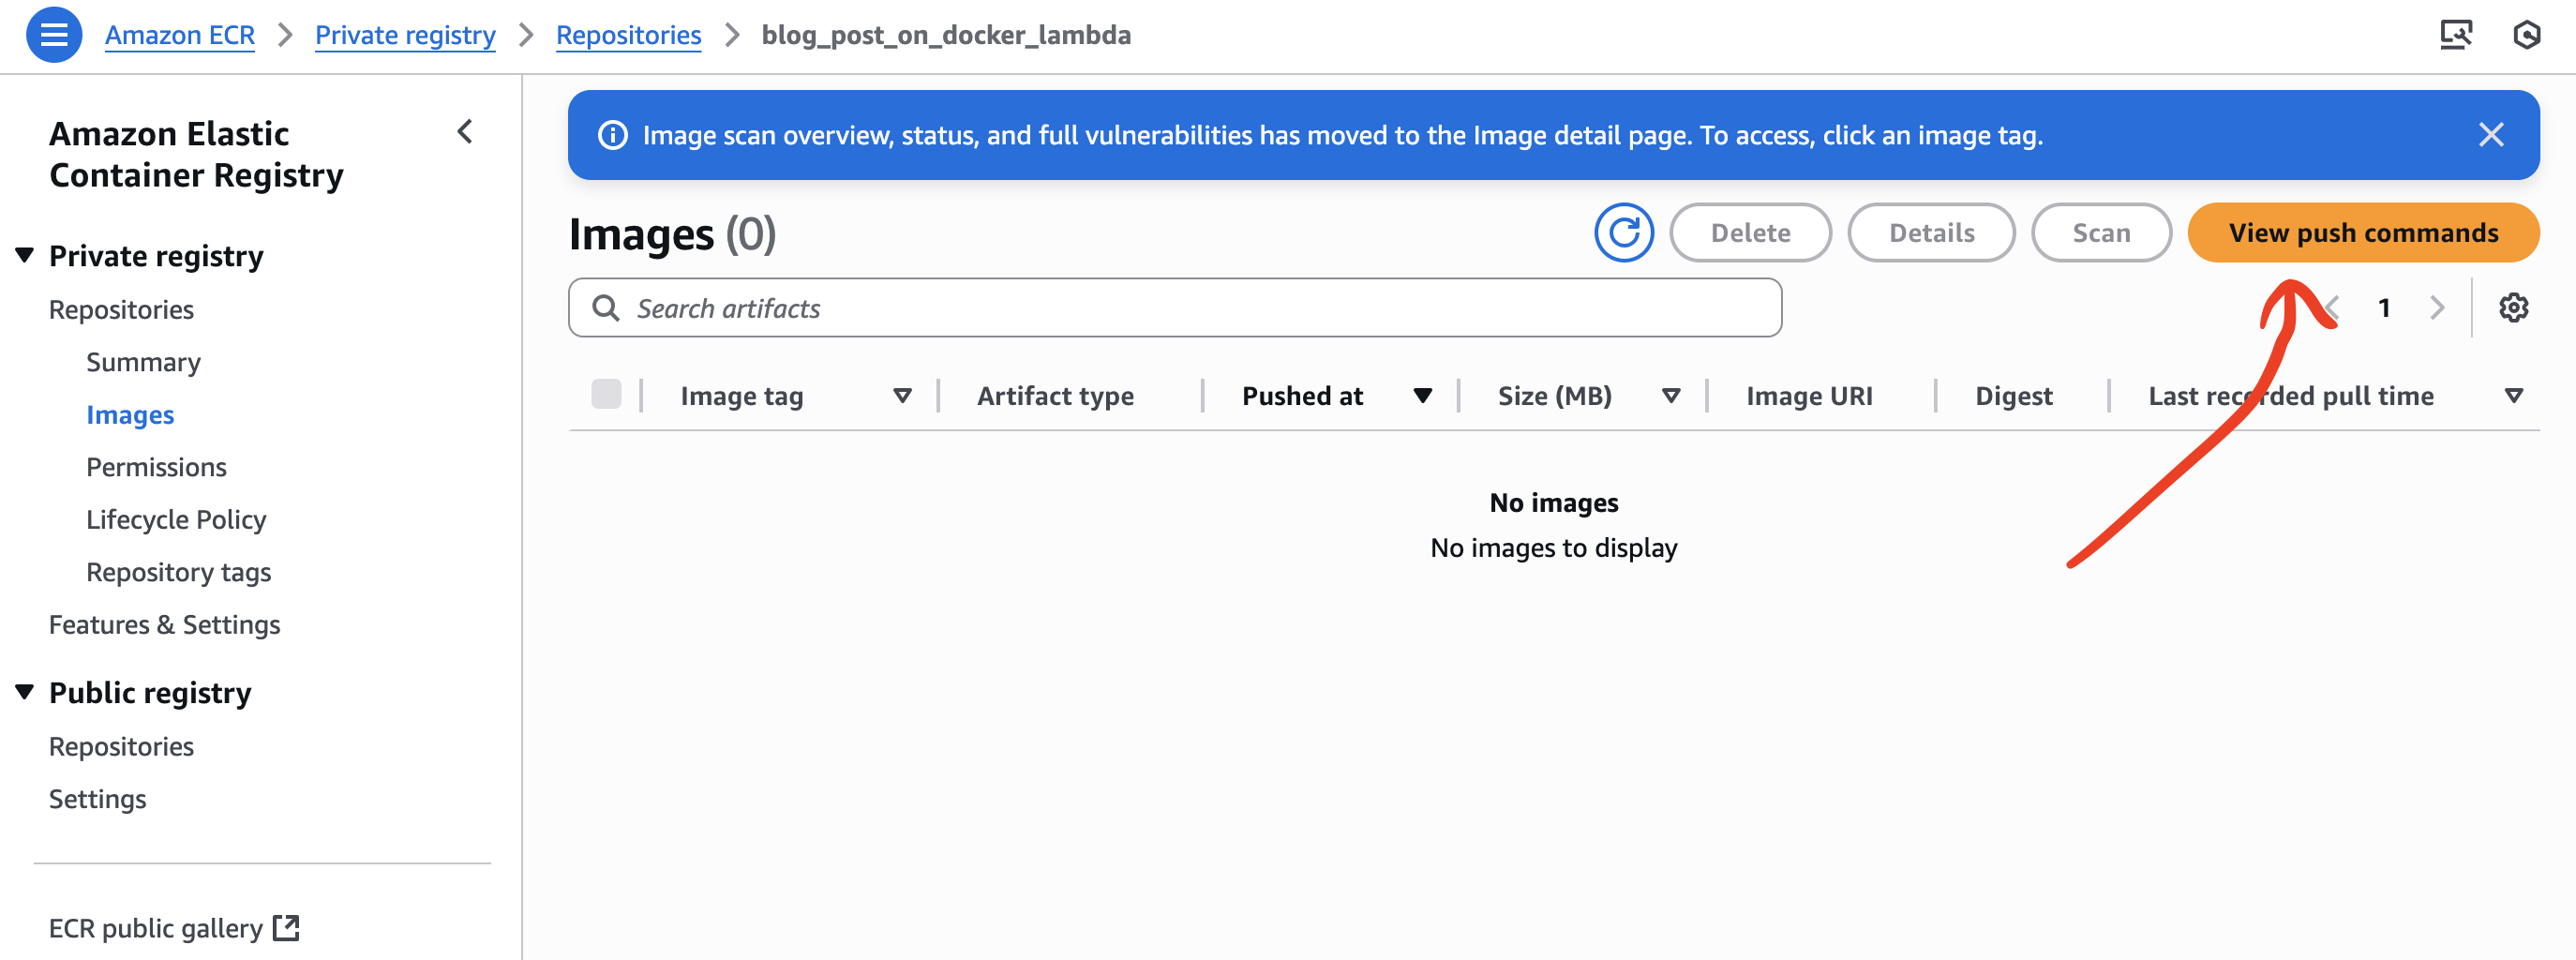
There are a couple of ways for Lambda to run your code including using a Docker image. Since you are already using the correct based image, it is a matter of pushing up your docker image to your ECR. There is a handle list of instructions that walk you through it once you have created your repository.
Adding Tests:
Running your tests as part of continuous integration is much easier when they’re already set up in your development container. You can simply reuse the same Dockerfile used for your development environment. I typically just modify that Dockerfile to include any test dependencies—such as pytest—and set the default command to trigger the tests upon initialization.
Dockerfile.test
# Image used by AWS for lambda python
FROM public.ecr.aws/lambda/python:3.13

# Add tar used by VSCode
RUN dnf install -y tar gzip \
 && dnf clean all

COPY requirements-dev.txt ${LAMBDA_TASK_ROOT}

# Install the specified packages
RUN pip install -r requirements-dev.txt

# or copy all code from a  directory
COPY src/ ${LAMBDA_TASK_ROOT}/src/
COPY test/ ${LAMBDA_TASK_ROOT}/test/
COPY lambda_function.py ${LAMBDA_TASK_ROOT}

ENV PYTHONPATH=${LAMBDA_TASK_ROOT}

# Override Lambda entrypoint
ENTRYPOINT []

# Default command: run tests
CMD ["pytest", "--maxfail=1", "--disable-warnings"]
This setup integrates smoothly into your GitHub Actions workflow, making it easy to automate testing (continuous integration) when making a Github request.
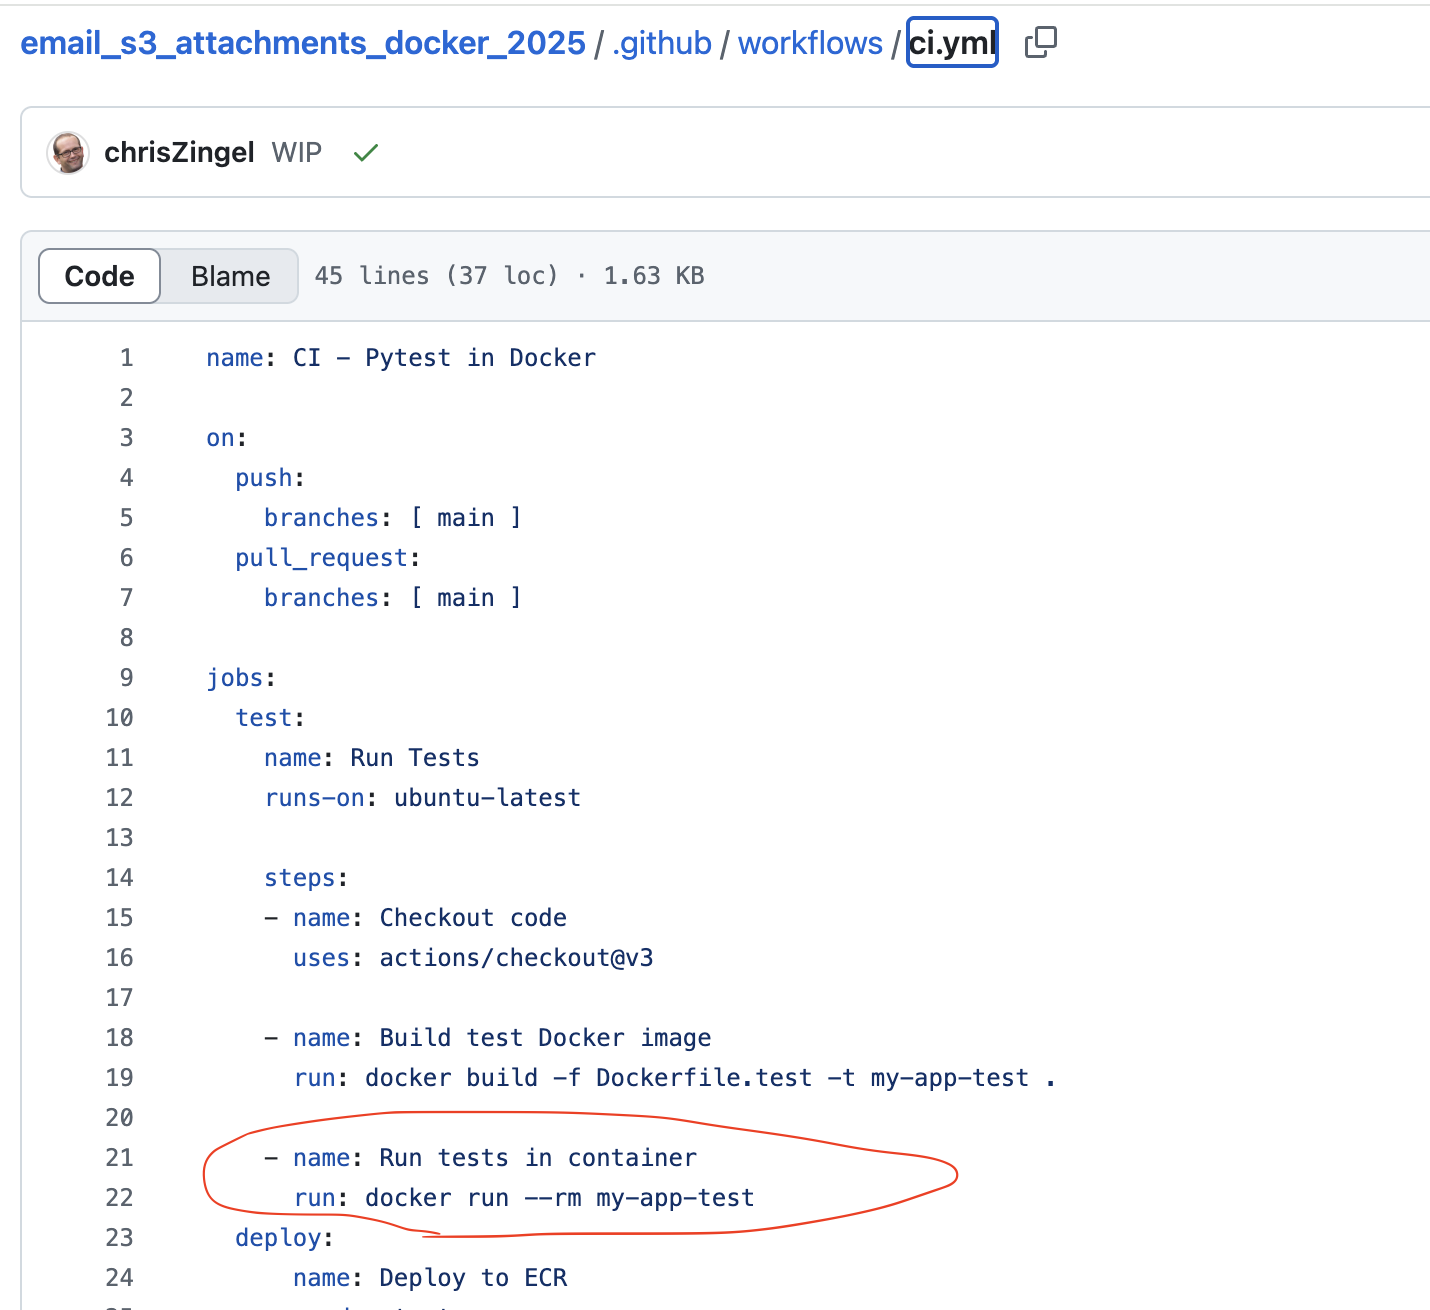
See this project for an example
Summary
This post walks you through how I went about developing AWS Lambda functions using Visual Studio Code and Docker. It covers how this setup helps with code debugging, streamlines deployment to AWS, and simplifies test automation.